If you’ve ever walked past a cardboard box factory, a furniture workshop, or a bookbindery and wondered what makes those perfectly even, sturdy bonds look so effortless, the answer often boils down to something most operators never stop to overthink: glue application angle adjustment on a gluing machine. As a supplier of industrial gluing machines, I’ve spent the last decade walking shop floors, troubleshooting missed bonds, and watching operators turn what looks like a tiny, trivial setting into the difference between a batch of products that pass quality checks and one that gets sent back for rework. Today, I want to break down what this adjustment actually is, why it matters more than most people realize, and how getting it right can save your team time, money, and a lot of frustration. Gluing Machine
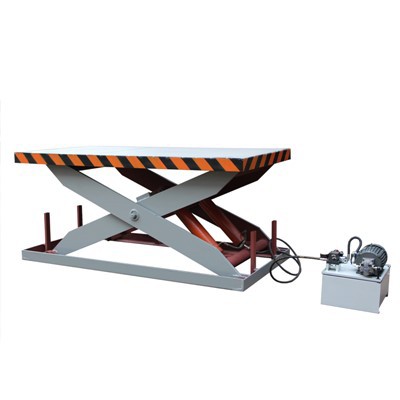
First, let’s get the basics out of the way. A gluing machine’s glue applicator is the part that deposits adhesive onto a surface—whether that’s a corrugated box’s seam, a wooden chair’s joint, or the spine of a paperback book. That applicator can be a roller, a nozzle, a brush, or even a spray head, depending on the machine’s design and the material you’re working with. The application angle is simply the angle at which this applicator meets the surface you’re gluing, measured from the plane of the material (think of it as if you were holding a pencil and tilting it toward or away from the surface you’re writing on). It’s not a setting most new operators reach for on their first day, but once you understand the science behind adhesive transfer, it becomes clear why it’s one of the most critical adjustable parameters on your machine.
Let’s talk about that science, because this isn’t just random trial and error. Adhesion works when glue molecules make contact with both surfaces you’re joining. If the applicator is at the wrong angle, two big problems pop up: either too much or too little glue gets transferred, or the glue sits on top of the material instead of seeping into its tiny gaps, which is where the strongest bonds form. For example, corrugated cardboard has fluted, textured inner layers that are designed to crumple and flex. If you angle the glue roller too steeply—say, 70 degrees from the cardboard’s surface—you’ll end up scraping across those flutes instead of pressing into them, leaving gaps where there’s no glue at all. That’s a surefire way to get boxes that split open when you stack a few of them on a shipping pallet. On the flip side, if you angle the roller too flat, like 20 degrees, you’ll end up dragging a thick layer of glue across the surface, and most of it will stick to the roller instead of the cardboard. You’ll waste expensive adhesive, and the seam will be uneven, prone to bubbling or peeling.
I learned this the hard way early in my career, when a small bookbindery in Ohio called me in to fix a problem they’d been fighting for months. They were running 10,000 paperbacks a day, and their spine glue was failing 12% of the time—meaning the pages would fall out within a week of a customer buying the book. The operator there had been setting the applicator angle at 45 degrees, which felt like a nice middle ground, but they were using a hot-melt PVA glue that works best when it penetrates the porous paper spine. When I checked their machine, I adjusted the angle to 35 degrees, just a 10-degree shift. The failure rate dropped to less than 1% by the end of the week. The operator later told me he thought “middle ground” was the right move, but angles aren’t one-size-fits-all—they depend entirely on three big factors: the type of glue, the material you’re bonding, and the speed of your machine.
That brings us to the next point: how to adjust that angle correctly, without guessing. Let’s start with material, because that’s the biggest variable. For dense, non-porous materials like solid wood or metal, you want a steeper angle, usually between 50 and 70 degrees. Why? Those materials don’t have tiny gaps for glue to seep into, so you need to press the applicator firmly enough to spread a thin, even layer of glue across the flat surface. A steeper angle means more contact pressure between the applicator and the material, which is exactly what you need for strong bonds on non-porous surfaces. For porous, absorbent materials like cardboard, paper, or fabric, you want a shallower angle, between 25 and 40 degrees. This lower angle lets the applicator glide over the surface without scraping, so the glue can seep into the fibers or flutes instead of sitting on top. It also reduces the chance of glue foaming or bubbling, which is a common issue when you force glue into porous materials too hard.
Next, glue type. Not all glue is the same, and your angle needs to adjust to the glue’s viscosity (how thick or runny it is). Thin, watery glues like water-based PVA work best with a shallower angle, because they spread easily—too steep an angle would push too much glue into the surface, leading to weak bonds. Thick, high-viscosity glues like hot-melt polyurethane (PU) need a steeper angle, because they don’t spread on their own. The steeper angle applies more pressure, forcing that thick glue into the joints where it needs to be. I’ve seen operators use the same angle for hot-melt and cold glue, and the result is always wasted glue or failed bonds—small adjustments here make a huge difference.
Third, machine speed. It might seem odd, but how fast your gluing machine runs affects the ideal application angle. If you’re running a high-speed line that cranks out 500 boxes a minute, you need a slightly steeper angle than if you’re running a low-speed line making custom furniture joints. Why? At higher speeds, the applicator doesn’t have as much time to make contact with the material, so a steeper angle increases the contact pressure and ensures enough glue transfers before the material moves on. At low speeds, you have more time, so a shallower angle is fine—you don’t need as much pressure, and you’ll avoid over-applying glue that would seep out of the joints and create messy, uneven bonds.
Now, let’s talk about common mistakes I see every day, because even small slip-ups here add up. The first mistake is treating the angle as a “set-it-and-forget-it” adjustment. I can’t tell you how many times I walk onto a shop floor and see a machine that was set for corrugated cardboard being used for book spines, with the same angle. Materials change, glue batches change, speed changes—so the angle should change too. A good operator checks this setting every time they switch jobs, or at least once a shift, to make sure nothing has shifted due to vibration or wear. The second mistake is relying on eyeballing the angle. Most modern gluing machines have clear angle markings on the applicator mount, but too many operators ignore them and go by “how it looks.” Eyeballing leads to inconsistent bonds—one box seam is perfect, the next is too thin, the next is too thick. The third mistake is not accounting for wear on the applicator itself. If your glue roller is worn down, or the nozzle is clogged, the angle won’t give you the same results as a new applicator. I always recommend replacing applicators every 6 months for high-volume lines, because worn parts throw off the angle and make every adjustment less effective.
Let’s tie this back to real-world results, because that’s what matters to shop owners. A furniture manufacturer I worked with last year was having issues with their chair leg joints failing during shipping. They were spending $1,200 a week reworking broken joints, and their customer was threatening to switch to a different supplier. We adjusted their application angle from 55 degrees to 48 degrees, matched their PU glue viscosity, and slowed their machine speed by 10%. The rework cost dropped by 90%, and they saved over $45,000 that year alone. That’s not a small number—all from a 7-degree adjustment. Another example: a box factory in Texas was wasting $2,000 a month on glue because they were over-applying to their shipping boxes. We adjusted their angle from 30 degrees to 28 degrees, and they cut glue waste by 35% within two weeks. Again, a tiny change, huge savings.
I know what some of you are thinking: this sounds complicated. Why can’t I just buy a machine that does this automatically? The truth is, many new gluing machines do have automatic angle adjustment features these days, which is a huge help for small operations with one or two people running the line. But even automatic systems need to be calibrated, and they still depend on understanding the basics I just laid out. If you don’t know that porous materials need a shallower angle, you can’t troubleshoot an automatic system when it starts producing bad bonds. For larger operations with multiple lines, the automatic features cut down on operator error, but they don’t replace knowing how angle works.
So, how do you get started adjusting your own application angle, if you’re new to this? Let’s walk through a simple, step-by-step process that I teach all my customers. First, check your material and glue: jot down if you’re working with porous or non-porous material, and what type of glue you’re using. That will give you a starting range. Next, reference your machine’s manual—most will have a recommended starting angle for common materials, so that’s your baseline. Then, do a test run: run 10 or 20 pieces of your material, apply glue at the baseline angle, then assemble the joints and let them set for the recommended dry time. Check for gaps, uneven glue, or messy excess. If you see gaps, steepen the angle by 5 degrees and test again. If you see too much glue or bubbling, flatten the angle by 5 degrees. Keep testing until you get consistent, even bonds with minimal excess. This process takes 10 minutes, and it’s the best way to make sure your angle is right for your specific setup.
If you’re here because you’re dealing with inconsistent bonds, wasted glue, or high rework costs, I want you to remember this: the glue application angle isn’t just a technical setting—it’s one of the easiest, most impactful adjustments you can make to improve your line’s efficiency and product quality. I’ve seen thousands of lines improve their output just by getting this right, and I’ve never had a customer tell me they regretted taking the time to dial it in.
At the end of the day, running a gluing operation is all about balancing three things: quality, speed, and cost. Get the application angle right, and you hit all three. Your products will be stronger, you’ll waste less glue and material, and your line will run faster without sacrificing quality. If you’re ready to learn more about how adjusting your application angle can improve your operations, or if you have questions about your specific machine setup, I’m here to help. We work with facilities of all sizes, from small custom workshops to large packaging plants, to tune their gluing machines for maximum performance, and I’d be happy to walk through your needs with you.
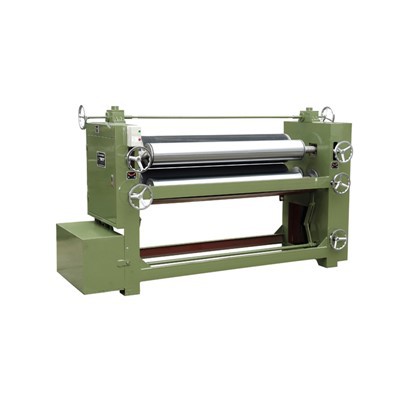
Don’t guess at your angle settings—small changes here make a huge difference in the long run. Reach out to us to discuss your gluing machine needs, troubleshooting, or any adjustments that can help your business run smoother. We’re here to support you every step of the way.
Cold Pressing Machine References
- Kinloch, A. J. (1987). Adhesion and Adhesives: Science and Technology. Chapman and Hall.
- Corrugated Packaging Technical Association. (2020). Best Practices for Adhesive Application in Corrugated Box Manufacturing. TAPPI Press.
- Furniture Industry Research Association. (2021). Joint Strength Optimization for Wood Adhesives in Mass Production. FIRA Technical Bulletin.
- Gluing Machine Operation and Maintenance Manual. (2022). Industrial Automation Solutions Inc.
Jiashan Changle Machinery Manufacturing Co., Ltd.
We’re well-known as one of the leading gluing machine manufacturers and suppliers in China, also support customized service. Please feel free to buy advanced gluing machine for sale here from our factory. Quality products and punctual delivery are available.
Address: Building 12, Zone A, Wanyang Innovation City, No. 23 Yucao South Road, Ganyao Town, Jiashan County, Jiaxing City, Zhejiang Province
E-mail: Changle84615620@163.com
WebSite: https://www.changlejx.com/
